Showing posts with label Flowers. Show all posts

Saturday, September 22, 2012

Holiday Design Show

I love when Askren & Son's Wholesale in Tucson holds their design shows. I make sure to travel a couple of hours to see what they have come up with this time. There warehouse is chalked full of ideas around every corner. Sunday I was privileged to attend their Holiday Presentation. I even fell in love with the saying on their invitation. It read,
 "The Askrens believe in Christmas...from its tallest of beautiful trees, to its smallest of peppermint candies...from it's images of a winking santa, to its memories of a baby in a manger." 
I think I might steel that for my Christmas cards.  Hitomi Gilliam, AIFD was the guest designer. She is SO awesome! She makes you think outside of the box. This is the only picture I got of Hitomi and of course her face is covered! 

A lot of these pictures were taken around Askren's. They are not just of Hitomi designs. I just liked this spring arrangement.


Let it be Fall!


A variety of bud vases with succulents in them.


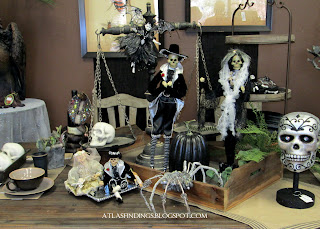
Very fun Halloween displays.


How about this for a table setting?


Dinner guest?


I love how they created their own vintage labels.


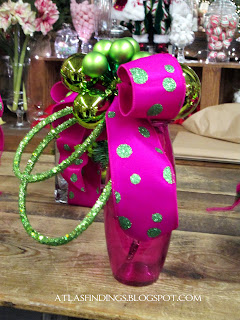
A very bright Christmas display.


Very Bright Wreath


Non Traditional Centerpieces


Green Poinsettias


A whimsical, mythical Christmas!


Picture of vintage Christmas Ornaments.

I liked the pillow, "Dear Santa I want It ALL!"


Fun wreath for the door.


Simple design for smaller spaces.


Amaryllis Centerpiece


Sometimes I take pictures of things that I want in my home!


Friday, August 31, 2012

Zipper Floral Ring and Bracelet

I have seen zipper jewelry for a while now and have really liked them and wanted to make some for myself and I finally did. I have hesitated to make some jewelry with zippers because I didn't want to waste any of them. I fell like they are expensive even though I know they are not. I know they sell one side of a zipper like they do lace but it is even more expensive.  One of my Husbands Grandmothers passed away a few months ago and I inherited some of her sewing supplies. In the sewing supplies there were several zippers. I didn't pay for them so I don't feel so bad using them! 
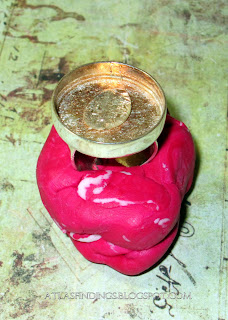
Supplies: zipper, glue gun & glue, sewing machine with zipper attachment, Amate Studios ring and bracelet base and a glob on clay. 

To start making the flower you will need to take the zipper apart. I did this by cutting across the zipper. Since you will not need the pull and my zipper was extra long I cut the zipper so that I could use part of it on another project. (With the left over piece you can add a few stitched and the bottom to keep it closed.) Take one side of the zipper and make a basting stitch using the zipper foot on your sewing machine. (You can hand stitch this if you don't have a sewing machine.) Leaving long tails of thread. 


Pull the bottom thread and start to make the zipper "ruffle."


Using your glue gun add a small dot to one end of the zipper and roll the zipper to make the center of the flower.


Add a little bit of glue and roll the zipper. Keep doing this until the flower is complete. Glue the end of the zipper just slightly under the flower so you don't see unfinished ends. 


Of course I forgot to take a picture of the finished flower by itself! Now put your ring base into a glob of clay to hold the ring in place. 


Add a large amount of hot glue to the well of the ring. Add more than what is in the picture, about 2/3 full. The more glue I added to the well the more you couldn't see it in the picture. If you fill it to full when you insert the flower the glue will overflow. Then insert the flower into the ring and press gently and hold in place for a minute to let the glue start to harden.


The ring.


The bracelet.


The ring and the bracelet.


I love how these turned out! They will go with so many outfits. I will probably make a few more in other colors. I am eyeing a turquoise zipper right now! 

Tuesday, August 21, 2012

Up Cycled Bangle Bracelet

While recently shopping I saw some cute bangle bracelets that had flowers on them. I knew that I could make my own! And definitely for a lot less money! The best thing is that very few supplies are needed and you probably have them laying around. For this I used vinyl fabric, thread, scissors, needle, button or button maker and extra fabric if you want to make your own button and a flower pattern. These particular Bangle Bracelets are from Amate Studios

 Cut out flower pattern. Pin pattern onto vinyl fabric and cut. Cut two flowers of the same size.  

 Now with a crap piece of vinyl material you will make a button. Below are the pieces that come with a button kit. There is a round plastic piece that you will use to trace the fabric with. A top and a bottom to the button, a white piece that you will put the button in and a blue piece that you will use to push the pieces together. 


Use the round plastic piece to cut a piece of fabric out. 


Now you will start to layer the pieces to make the button. Put the fabric right side down on the table. Put the inside of the button (the rounded piece) on top of the fabric. Now you will put those two pieces into the white plastic. Now you will push the fabric pieces on top of the inside button piece and then put the outside piece of the button on top holding together. Now using the blue piece push the outside piece of the button down with firm pressure until the button is formed together. Pop out of the white piece and you have a button! 

 The final button! 


Layer the two flowers on top of each other so that the petals are alternating and not directly on top of each other. With the needle and thread starting in between the layers so that you don't see the end sew a circle (about where the white circle is)  in the center of the flowers and pull tightly like you are making a ruffle. Finish the stitch on the top side of the flowers and don't tie off the end yet. 


Now you will add the button to the top of the flower. The button loop isn't very big and might take a little bit of playing to get the button sewn on. Now you will start to sew the flower onto the bangle bracelet making sure to stitch in between the two layers of flowers so that you don't see the stitching on top.


Finish by tying a know in between the layers of the flower and cut the end off. 


Enjoy your flower bracelet! 


The teal flower was my trial and error one. I tried making it with sewing individual petals together. While you can't tell in the photo it is a much more flimsy flower and the button feels loose because of the flimsy base.