Wednesday, November 14, 2012

Recycled Fence Sign

I work every other Saturday. I had last Saturday off and knew it was a great day to be cleaning my neglected house. I didn't want to clean my house because I was feeling crafty! I was feeling the need to use power tools. At my house we have a pile of scrap wood, most of it left over from other projects. I went and looked at the pile to see what was there and what would inspire me. In the pile there were several pieces of left over fencing that were very aged. 
I first decided how big I wanted the sign mostly based on how long the wood was. I used a circular saw to cut the pieces. ( The finished piece is approx 17 X 33) I also cut some thin strips of wood for the backing.  I cut them so that they would cover each of the bigger pieces with out going to the edges because I didn't want to see the back strips. 


Then I attached the thin strips of wood with nails to the back. 


After attaching the first thins strips of wood I realized that the top and bottom pieces of wood didn't seem stable enough so I added some more thin strips for stability. 


Next I used eye bolts and frame wire to hang the sign. 


I attempted to draw on the wood how the letters would look. After I did that I then used craft paint to paint, " Home is where the heart is." I didn't quite like how the heart turned out. I didn't like the shape or the color. I ended up using a small file to file off some of the paint to help shape the heart better. I also used some red glitter glue to sparkle up the heart. Now an empty wall in my front room has some decoration!


Wednesday, November 7, 2012

T-Shirt Pattern with Tuxedo Ruffle

I have a couple of favorite T-Shirts. You can tell they are my favorite because of the stains and holes! With some extra fabric laying around (ha ha) I decided to make a pattern out of my favorite T-Shirt and make a new T-Shirt. This was one of the easiest article of clothing that  I have ever made with out a store bought pattern! Even the beginning sewer can sew this T-Shirt. 
First Start by finding one of your t-shirts that is only two pieces of fabric. One that doesn't have sewn on sleeves. If you want to make a pattern for later use, lay the t-shirt onto wrapping paper and trace a pattern onto the wrapping paper making sure to add extra for the seam. Cut two pieces of fabric out. Lay the wrong sides together. If you want to pin the pieces together you can. Because this pattern is pretty straight forward I didn't pin my pieces together.


Start sewing by sewing the shoulders together. Then sew the sides together. 


Next sew your seams. I started with the bottom then the collar and sleeves. 


Here is the shirt I traced and the finished project.


I needed (wanted) to add something a little dressier to this t-shirt so I decided to add a tuxedo type ruffle. Measure how long you wand your ruffle to be. I wanted my finished ruffle to be approximately 14 inches so I cut my piece about 21 inches long. Fold a piece of fabric in half and cut a wave in the fabric the length you want. Cut a second piece about 1/2 inch smaller than the first piece. 


Ruffle each piece. 


Sew the larger ruffle piece onto the center front of the shirt. Then sew the second ruffle on top of the larger ruffle. After washing the ruffle will role a little bit. After I washed mine I ended up cutting the ruffle down. Try the shirt on and see how it looks. At first I felt the ruffles were jumping off of my chest!


Here's the finished product! 


Enjoy! 

Saturday, November 3, 2012

Apple Fritters


When I found this recipe from Seemingly Greek I pinned it on pinterest earlier this year because I love getting Apple Fritters from the grocery store. I printed it and put into my recipe binder to make someday. Then a few weeks ago I was again looking on pinterest and found a recipe pinned it on pinterest and printed it out. When I looked through my recipe binder I realized that I printed the recipe twice. I guess that means I should make the recipe. It was actually pretty easy to make and yummy too!


Apple Fritters

Ingredients:

1 heaping cup of flour
1/2 cup sugar
1 tsp baking powder
1-2 teaspoons cinnamon
dash of salt
1/4 teaspoon nutmeg
1/2 teaspoon vanilla
1 tablespoon melted butter
1 egg
1/3 cup milk (+ more if needed)
1 - 1 1/2 cups chopped apple, peanut size ore smaller

oil for frying

Glaze: 1 cup powdered sugar and 1 tablespoon milk

Directions:
Mix all dry ingredients together, slowly add the wet ingredients minus the apple. Carefully mix until well combined but not overly beat, gently fold in the apple pieces. The batter should be the consistency of a light cake mix. Once the oil is ready, using a cookie scoop, place a few balls of dough into the oil. Be careful not to overcrowd the balls. watch carefully for the underside to turn golden brown, then gently flip over and continue frying until done. I used a skewer to flip the fritters over. They will cook approximately 45 seconds on each side. I cooked one by itself first to see if it was done in the center and adjusted my time from there. When the fritters are done cooking set them on a paper towel to catch the extra grease. When you are all done cooking the batter, mix the ingredients together for the glaze. Dip each fritter into the glaze and set on a cooling rack with a paper towel underneath to catch any extra glaze that may drip off. Serve and enjoy!

Thursday, November 1, 2012

Chocolate Cupcake with Blackberry Butter Cream


I recently went to a produce market and they had blackberries at a pretty good price so I bought a lot! Last time I bought black berries I made a blackberry jalapeno jam. Since I still have several jars of the jam I wanted to make something different with the blackberries. Berries and Chocolate always go together in my mind so what better than to make a Chocolate Cupcake with a Blackberry Butter Cream Frosting. Adding the blackberry on top of the cupcake made it even that much better. I hope you enjoy!

Chocolate Cupcake with Blackberry Butter Cream
Yield: 24 cupcakes

Ingredients:

Cupcake:
1/2 cup plus 1 tablespoon cocoa powder
1/2 cup plus 1 tablespoon hot water
2 1/4 cups cake flour
3/4 teaspoon baking soda
3/4 teaspoon baking powder
1/2 teaspoon salt
1 cup plus 1 tablespoon butter at room temperature
1 2/3 cups granulated sugar
3 eggs
1 tablespoon vanilla
3/4 cup sour cream

Frosting:
5 tablespoons of blackberry puree, strained to get the seeds out
1 cup butter at room temperature
5 cups of powdered sugar
24 blackberries for garnish

Directions: 


1.Preheat oven to 350 degrees F. Line standard-size muffin pans with paper liners.
2. In a small bowl, whisk together the cocoa powder and hot water until smooth. In a separate medium bowl, whisk together the flour, baking soda, baking powder, and salt.
3. Combine the butter and sugar in a medium saucepan set over medium heat. Cook, stirring occasionally, until the mixture is smooth, and the butter is completely melted. Transfer the mixture to the bowl of an electric mixer and beat on medium-low speed until the mixture is cool, about 4 to 5 minutes.
4. Add the eggs one at a time, mixing well after each addition, and scraping down the sides of the bowl as needed. Add the vanilla and then the cocoa mixture, beating until smooth.
5. Reduce the mixer speed to low, and add the flour mixture in three additions, alternating with the sour cream, beginning and ending with the flour mixture. Mix each addition until just incorporated.
6. Divide the batter evenly between the prepared liners, filling each about two-thirds full. Bake until a toothpick inserted in the center comes out clean, 18 to 20 minutes, rotating the pans halfway through baking. Let cool in the pan for 10 minutes, then transfer to a wire rack to cool completely.
7. Beat the butter and 1/2 of the powdered sugar together til mixed. Add the blackberry puree and remaining  powdered sugar 1/2 cup at a time til well combined. 
8. Once cupcakes are cooled completely frost with the blackberry butter cream and top with a blackberry. Serve and enjoy!


Sunday, October 14, 2012

Chocolate Peanut Butter Popcorn

I'm addicted to flavored popcorn. Enough said! Here is a recipe for Chocolate Peanut Butter Popcorn. 


Chocolate Peanut Butter Popcorn

Ingredients:
12 cups air popped popcorn 
1/2 cup softened butter
3/4 cup brown sugar
1/2 cup peanut butter
3/4 cup melted milk chocolate chocolate chips

Directions:
  1. Pre Heat oven to 250 degrees F
  2. Pop popcorn and set aside.
  3. In a large glass bowl combine the butter, brown sugar and marshmallow cream. 
  4. Cook mixture in microwave for 3 minutes. Stopping in between each minute to stir. 
  5. Stir in peanut butter and mix until smooth.
  6. Pour mixture over the popcorn and stir quickly til coated evenly.
  7. Pour popcorn into a oven safe pan. (I use a jelly roll pan or a large cake pan) Bake for 45 minutes. Stir every 15 minutes. Take out of oven.
  8. Melt milk chocolate chips and then put into a pastry bag and drizzle over the baked popcorn and stir till chocolate is coating the popcorn. 
  9. Let cool and store in air tight container.

Thursday, October 11, 2012

Salted Caramel Pretzel Chocolate Chip Cookie

Now try and say that twice! Salted Caramel Pretzel Chocolate Chip Cookie. Yep, it is exactly what it says it is. I found this recipe on Pinterest via The Diary of Daves Wife. Basically if it has all of my favorite ingredients listed in the title it must be good. And it is!

Salted Caramel Pretzel Chocolate Chip Cookie

Yield: About 34 Cookies

Ingredients:
3/4 cup butter, softened
3/4 cup brown sugar
1/4 cup granulated sugar
1 egg
2 tsp vanilla
2 cups flour
2 tsp cornstarch
1 tsp baking soda
1/2 tsp salt
1 cup chocolate chips 
1 cup caramel bits
1/2 cup pretzel pieces
Sea Salt

Directions:

1. Pre heat oven to 350 degrees F
2. Cream together butter and sugars until light and fluffy. Add egg and vanilla and blend in.
3. Mix in flour, cornstarch, baking soda and salt.
4. Stir in Chocolate Chips, Caramel bits and Pretzel pieces.
5. Scoop dough onto baking sheets and sprinkle with Sea Salt. 
6.  Bake for 8 to 10 minutes until almost golden brown.
7. Cool for 5 minutes and remove onto a cooling rack.

Original recipe called for milk chocolate chips I used semi sweet because that is what I had. It also called for crushed pretzel pieces, I didn't totally crush mine because I wanted to taste pieces and didn't want them to get lost. Next time I will double the recipe they were so good.I ate one last night, one at work and two after dinner!   When I left for work this morning I put a sign on the cookies saying, " Don't eat all of the cookies, Love, Mom."  It actually worked. Most of the time when I make a dessert in the evening the next day when I get home from work there isn't any left. The kids actually listened to my note! 

Saturday, October 6, 2012

Fruit Salsa

Sounds weird right? In my church I serve with the Young Women. For one of our combined activities we had a salsa challenge. There was one long table with a lot of ingredients. We divided into our three class groups, then we went to the table and grabbed what ever ingredients that we wanted. The girls grabbed the typical tomatoes, jalapenos, cilantro, salt, pepper, green bell peppers and onions. I then started to grab the mango, strawberries, pineapple and lime. We brought all of the ingredients to our table and started cutting everything! We made two salsas but could only be judged on one. Not that the traditional salsa was bad but the Fruit Salsa was much better! For the judging it was a tie between our Fruit Salsa and a traditional salsa. The traditional one won by a coin toss! Next time I think we would have three judges instead of two.


The Fruit Salsa was so good that I brought about 2 cups worth home. The next day on the way to work I stopped a bought a bag of tortilla chips to eat the fruit salsa with.  I was in a non sharing kind of mood with this oh so good salsa that I only shared it with one  co-worker and we basically ate  almost the whole thing by ourselves. So of course I had to make more a few days later. I made enough that I wanted to can it. Now you don't have to can it. It taste so good that you would probably use (eat) it all before it goes bad in the refrigerator.  I scoured the internet (looked at a few recipes) to see if there was anything special that I needed to do. I couldn't find anything special to do other that some recipes for Mango Salsa say to use green mango's not ripe ones. I was afraid of the fruit turning colors so I did add some fruit fresh and did use green mango's. Next time I would go ahead and use ripe mango's because I wanted to eat some salsa right away and some bites of mango were hard. No bueno!  Here is a picture of the finished product. 


Fruit Salsa
Yields: 5 1/2 pints 

Ingredients:
2 large Mango's or 4 small/medium Mango's
2 Pineapples
2 lbs of strawberries
2 jalapenos
Cilantro to taste
Juice from 2 limes
1 tablespoon Sea Salt
Gloves

Directions:
  1. Cut up fruit (Mango, Pineapple, Strawberries) into small bite size pieces - About a quarter of an inch in size.
  2. Using gloves cut up jalapeno into very tiny pieces. You can keep the seeds for more heat or eliminate them. 
  3. Finely chop the cilantro. 
  4. Mix the fruit, jalapenos, and the cilantro. 
  5. Add the juice from two limes. (Before you squeeze them cut them in half then roll them on the counter or cutting board to loosen the juice. It will make it easier to squeeze.)
  6. Add the salt.
  7. Mix all ingredients well.
  8. At this point you can eat it and refrigerate any left overs. If you want to can it you will need to put the ingredients into a pot and cook for 5-10 minutes to get the mixture hot. Ladle hot fruit salsa into hot jars, leaving 1/4 inch headspace. Remove air bubbles. Adjust two-piece caps. Process 15 minutes in a boiling water canner.

Thursday, October 4, 2012

Key Lime Cupcakes

I don't now about you but I usually make the same desserts over and over because they are good and familiar. I have been trying to broaden my scope of recipes. I've never tried anything flavored with lime before except a Cherry Limeaide from Sonic. So I decided to try this Key Lime Cupcake recipe. I must say that it was quite refreshing!


Key Lime Cupcakes

Recipe:

1 3/4 cups cake four
1/2 teaspoon baking powder
1/2 teaspoon baking soda
1/2 teaspoon salt
1/2 cup cool unsalted butter, cut into 8 pieces
1 1/4 granulated sugar
2 large eggs at room temperature
2 1/2 tablespoons key lime juice
1 tablespoon key lime zest
1 drop of green food coloring
3/4 cup buttermilk at room temperature

Frosting:

1/2 cup cool unsalted butter, cut into eight pieces
8 ounces cream cheese at room temperature cut into 8 pieces
2 1/4 cups powdered sugar
1 tablespoon key lime zest

Directions:

  1. Pre heat oven to 350 F. Line cupcake pans. 
  2. Mix the cake flour, baking powder, baking soda and salt, set aside
  3. Using a mixer beat the butter on low until it's softened a bit. 
  4. Add the sugar and increase the speed to medium. Beat until fluffy.
  5. Add one egg at a time, beating well after each addition.
  6. Add lime juice, zest, and food coloring and beat until mixed. (The mix will look curdled)
  7. Add the flour in three additions, alternating with the buttermilk, beginning and ending with the flour, scraping down the bowl as necessary. Mix on low until combined. 
  8. Fill each cupcake liner 2/3 full.
  9. Bake 20 to 25 minutes. Cool completely 
  10. For the frosting, mix the butter on low until it's softened. Increase the speed to medium and add the cream cheese one piece at a time. Reduce speed to low and slowly add powdered sugar until combined. Beat in the key lime zest.
  11. Frost the cupcakes and enjoy!
You can make approximately either 36 mini cupcakes and 12 regular size cupcakes or 24 regular size cupcakes. 

I thought I "pinned" this recipe. I can't find it even looking with Google. So if this is your recipe let me know and I will credit you! 

Wednesday, October 3, 2012

Piano Find and Piano Bench Re Upholstered

Did you know that many of your Cities and School Districts have surplus stores? I found out a couple of weeks ago that my kids school district has a surplus store, is open on the first and third Tuesday of each month during the school year between 6:30 am and 9:30 am. Crazy and not very many hours. If you want the really good stuff you go when the school year starts. They have shop tools, kitchen appliances, preschool play sets, T.V's, stereos, chairs and lots more! A friend went last month because he heard that they have pianos. He was able to go and buy a piano for $150! He also told me that there were 2 left. I had to get me one. I played when I was a lot younger and have wanted my kids to play but could never afford a piano. I couldn't really afford this one but couldn't pass up on the deal! When we got there they told us that one of the pianos was untuneable. I'm guessing the sound board is cracked. So I was hoping the other one was in good shape. When I saw the piano I played a few notes and I was sold. It will need to be tuned but that will be another day! 

Since it came from a school it had these large casters on them. I want to change them because I don't like the look but they sure do make it easier to move!


I was so excited to get the piano that I didn't even notice that it was missing a leg! I can fix that, someday!


My dad came over today and we were talking about the piano. I told him all I need now is a piano bench! He said he had one at home! Yeah! I don't have to pay for one! I knew it would be in rough condition. The bench is in as good as condition as the piano. I want to refinish the piano and the bench to be the same color and fix some of the scratches. For now I decided to re upholster the bench. It was pretty gross looking. I took a close up of the fabric but decided to spare you the grossness! 


It was pretty easy to take apart. Only four screws! I took off the old fabric to find an even older fabric underneath. I didn't take that one off because I was afraid to find out what was underneath that! I went through my stash of fabric to see if I had something that I could use to reupholster the bench. I added a little more batting over the really old fabric then added some red vinyl over that. 


Here is the (almost) finished project.


This is what the sides of the bench look like. When I decide a color for the piano I will take care of the bench at the same time. 


Here is a close up of the vinyl.


Now all I have to do is find a piano teacher for my 5 kids that won't cost an arm and a leg!!!


Tuesday, September 25, 2012

How to Make Cake Flour

It is still Tuesday even thou it is 9:50 in the evening. I hope you can find this tip as useful as I have. Have you ever come upon a recipe that called for cake flour and passed it up because you didn't have any? I have on occasion or I just used All Purpose Flour and wondered if it really made a difference. The difference between the flours is the gluten. The more protein the wheat has the more gluten it has. Gluten is the element responsible for making the end result either tough as in breads or airy and crumbly as in cakes or pastries. I'm not one to have different types of flours on hand. So when making some recipes that called for cake flour I wondered if you could make your own? Sure enough you can! It's actually pretty easy. 


Cake Flour

Ingredients:

All Purpose Flour
Corn Startch

Directions: 

Measure out one cup of all purpose flour and pour it into a bowl. Now with a tablespoon take two table spoons of the flour out of the bowl and return it to the flour bag. Now measure out two tablespoons of corn starch and add it to the flour in the bowl. Mix the all purpose flour and corn starch together with a sifter. Now you have cake flour! Now the trick is to remember this when baking!

Saturday, September 22, 2012

Holiday Design Show

I love when Askren & Son's Wholesale in Tucson holds their design shows. I make sure to travel a couple of hours to see what they have come up with this time. There warehouse is chalked full of ideas around every corner. Sunday I was privileged to attend their Holiday Presentation. I even fell in love with the saying on their invitation. It read,
 "The Askrens believe in Christmas...from its tallest of beautiful trees, to its smallest of peppermint candies...from it's images of a winking santa, to its memories of a baby in a manger." 
I think I might steel that for my Christmas cards.  Hitomi Gilliam, AIFD was the guest designer. She is SO awesome! She makes you think outside of the box. This is the only picture I got of Hitomi and of course her face is covered! 

A lot of these pictures were taken around Askren's. They are not just of Hitomi designs. I just liked this spring arrangement.


Let it be Fall!


A variety of bud vases with succulents in them.


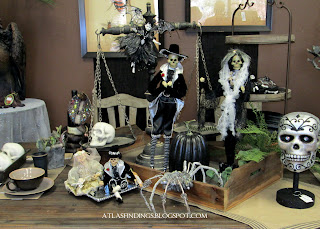
Very fun Halloween displays.


How about this for a table setting?


Dinner guest?


I love how they created their own vintage labels.


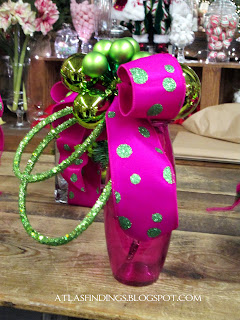
A very bright Christmas display.


Very Bright Wreath


Non Traditional Centerpieces


Green Poinsettias


A whimsical, mythical Christmas!


Picture of vintage Christmas Ornaments.

I liked the pillow, "Dear Santa I want It ALL!"


Fun wreath for the door.


Simple design for smaller spaces.


Amaryllis Centerpiece


Sometimes I take pictures of things that I want in my home!